At LockBase Cyber, we work with organizations of varying sizes, industries, levels of sophistication, and maturity. In conversations about Microsoft XDR capabilities and features, a common question that arises is: "What are the benefits of choosing Microsoft Defender for Endpoint when I already have an EPP/EDR solution in place and do not plan to switch?"
I enjoy this question because it gives me an opportunity to share MDE's other capabilities (outside of it being an EPP/EDR solution), but also how to run MDE side-by-side with your existing EPP/EDR solution.
Since this topic has been brought up enough times, we wanted to take the opportunity to share our perspective, and experience why consider running MDE side-by-side and How to do it.
In a blog post like this, we cannot address every possible scenario, setup, technical debt, etc. However, we will emphasize the essential steps and potential pitfalls. This should set you on the right path. Throughout the process, we will implement changes, including some that global changes. It is important to act responsibly and follow change control procedures as necessary. Given the nature of these modifications, they do not fall under the category of "desired state configuration" (DSC). The goal is to integrate MDE alongside an existing EPP/EDR solution to leverage additional features offered by MDE. When configuring any security solution, such as bypasses, disabled settings, overrides, etc., the system will adhere to our settings. Consider this a warning.
In terms of assumptions, here are a few we're assuming you already have, if you plan on following along:
Before delving into the technical details, let's address the "WHY". Honestly, there are compelling reasons to consider deploying Microsoft Defender for Endpoint (MDE) alongside an existing Endpoint Protection Platform (EPP)/Endpoint Detection and Response (EDR) solution.
Microsoft Defender for Endpoint (MDE) is much more than an EPP/EDR solution. As part of the Microsoft XDR family, it natively integrates with the following products:
The native integrations offer a wealth of telemetry data that is crucial for identifying potential threats and suspicious activities, all of which MDE collects passively. This approach is often regarded as 'defense in depth' because it provides an additional layer of perspective and analysis of behaviors. To shed light on the 'why,' I aim to connect real-world scenarios from our experiences that demonstrate how MDE delivers deeper insights into malicious and suspicious behaviors.
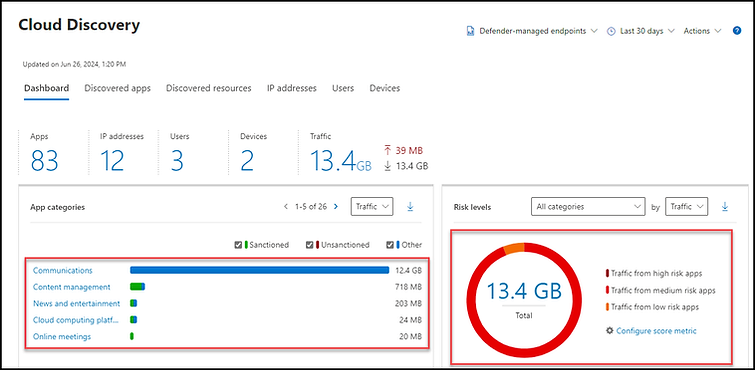
I worked with a customer who routed their Palo Alto traffic to MDCA, which provided insights into the SaaS applications their users were utilizing, the associated risk levels, and the volume of upload/download traffic. However, this data was incomplete because we lost visibility whenever the workstation (laptop) disconnected from the corporate network.
To enhance our monitoring of user activities during off hours, we integrated their workstations with MDE alongside SentinelOne.
If you're not informed, MDE can passively share its SaaS-related network traffic with MDCA. This means that regardless of whether the device is behind a corporate firewall, connected to an always-on VPN solution, or at home on an ISP, as long as MDE has an internet connection, it will transmit its data to MDCA. This capability was crucial in detecting a contractor who was uploading company source code to their personal Dropbox after hours.
To clarify, MDCA triggered the alert, but it was due to the information provided by MDE. Additionally, as the device was registered with MDE, we could access the device's "Timeline", install applications, vulnerabilities, and more through MDE and determine which files had been uploaded.
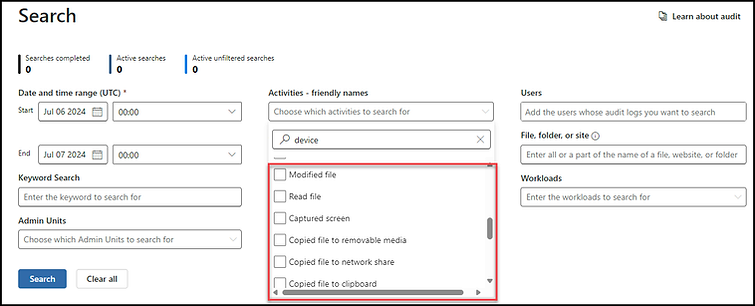
While working with a customer on a Microsoft Purview Information Protection and DLP project, our primary focus was on labeling and protecting sensitive data in the cloud, including Teams, OneDrive, and Exchange. During our discussions, I inquired about safeguarding data beyond their file servers, particularly against data exfiltration on workstations. They responded, "We use CrowdStrike to block all mass storage USB devices." While I appreciated their efforts in this area, concerns remained about scenarios such as a user taking a screenshot of a sensitive document to print, or a remote user transferring company data to a personal computer via UNC path, especially when both devices share the same Wi-Fi network.
This inquiry ultimately prompted us to integrate over 50,000 devices with MDE in passive mode, which revealed that numerous users had been transferring sensitive data to their personal computers prior to departing the organization.
I assisted a customer who had recently acquired the E5 license suite for their organization. Traditionally, the IT department favored software solutions considered "best in breed." Nevertheless, the leadership of the customer encouraged the IT team to explore how MXDR could fill in gaps and possibly supplant any areas where "Microsoft outperforms."
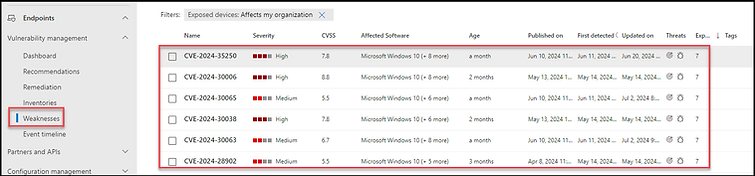
The customer was struggling with endpoint Threat Vulnerability Management, a common challenge for many. It was encouraging to learn that this issue was being prioritized.
To understand which vulnerabilities were detected on their endpoints, we rapidly integrated several devices with MDE in passive mode. As a result, MDE swiftly identified new vulnerabilities that their current product had missed. This led to immediate celebration (yay, we discovered something new), followed by urgency (because we need to patch it ASAP).
Following this discovery, we initiated the onboarding of additional devices with Microsoft Defender for Endpoint (MDE) to deepen our insights. This provided the customer with an additional data point for threat vulnerability management and identifying potential threats.
When setting up Defender for Endpoint in passive mode, it's important to configure several key items. Keep in mind that these settings are not the desired state configuration (DSC) for MDE as the primary EPP/EDR solution. The aim is to maintain MDE in "passive mode" to avoid conflicts with existing EPP/EDR solutions. The following steps outline what needs to be done to achieve this objective.
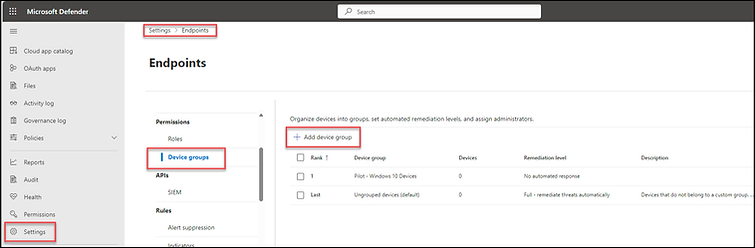
When devices are integrated with MDE, they become part of what is known as a "Device Group." Essentially, MDE device groups categorize devices (by tag, operating system, hostname, etc.) and dictate the response protocol when a threat is identified using Microsoft's Automated Investigation and Response (AIR).
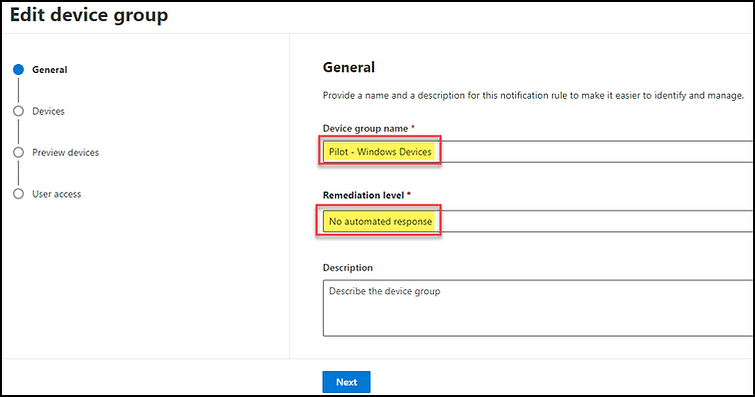
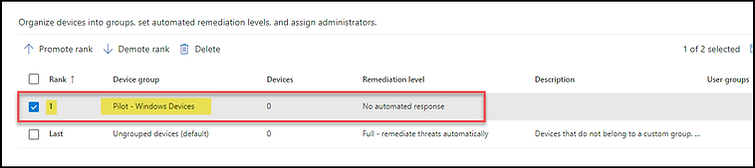
In our scenario, we will establish a device group and assign a remediation level of "No Automated Response". This means no actions will be taken when a threat is detected; we simply aim to monitor the device.
To create a device group, you must log in to the Microsoft Defender portal. This is accomplished by navigating to https://security.microsoft.com/, selecting 'Settings', then 'Endpoints', followed by 'Device Groups', and finally clicking on "Create Device Group".
Name the device group (e.g., Pilot - Windows Devices), then set the remediation level to 'No automated response' and click 'Next'.
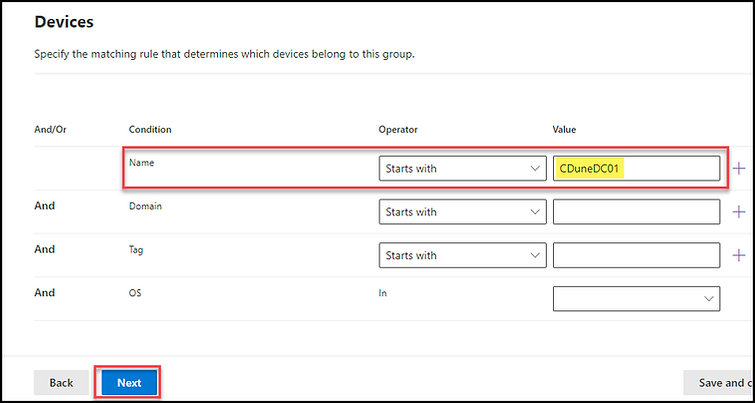
We need to establish the criteria or logic for determining which devices should be included in this device group. Considering our goal, we aim for a narrow scope of device inclusion. Therefore, I will explicitly define a hostname to prevent the accidental addition of unrelated devices to this group. After you have entered your criteria, click on "Next."
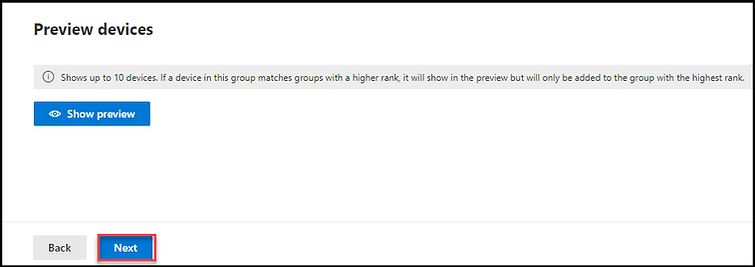
In the preview devices section, click on "Next"
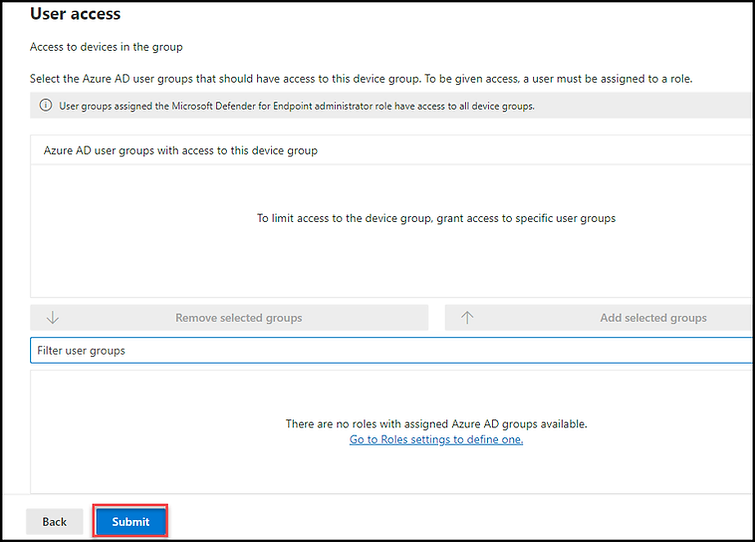
In terms of "User Access", leave it as-is and click on "Submit"
Note: If you are already utilizing RBAC, you should assign the Entra ID Groups that need access to this device group. If this is your initial setup in your tenant, it's likely that this will be blank. Establishing and configuring RBAC is somewhat beyond the scope of this scenario.
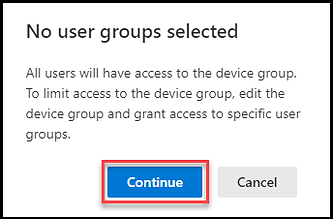
If no user groups are selected, a pop-up may appear. Please click on "Continue."
Click on "Done"

At this point, we should see our new device group listed.
When EDR in block mode is activated, it offers extra protection against malicious artifacts when Microsoft Defender for Endpoint is not the primary EPP/EDR solution. It will remediate threats that may have been overlooked by other antivirus products. Because MDE needs to be in passive mode, this setting ought to be off.
Note: You can locate this setting by navigating to: https://security.microsoft.com, then going to Settings > Endpoints > Advanced Features, and setting 'Enable EDR in block mode' to 'off'. Remember to save your preferences.
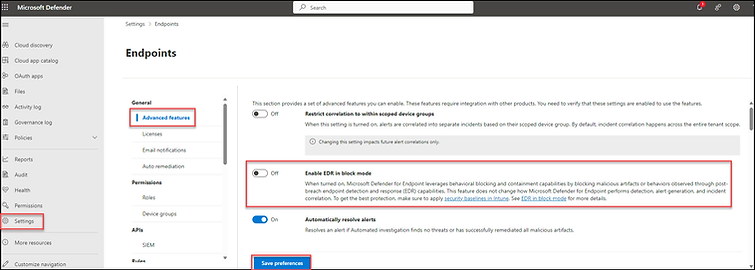
As a precaution, be aware that this is a global setting. When activated, devices enrolled with MDE will have their local settings overridden, and EDR in Block mode will be implemented. For instance, even if you configure the registry setting to set EDR Block mode to passive, it will be disregarded.
If this setting is active in your tenant, consider the implications carefully before disabling it. We must avoid affecting production workloads that rely on MDE as their main EPP/EDR solution. To verify if devices are registered with MDE, navigate to 'Assets' then 'Devices' on the security.microsoft.com portal and check for "Onboarded Status = Onboarded". Devices listed as "Onboarded" will be affected by this change.
Finally, if this setting is enabled and we are in a position where we can't turn it off, you can still onboard the device with MDE, however be cautious. There could be an instance where MDE flags certain behavior activity as malicious, potentially blocking the process.
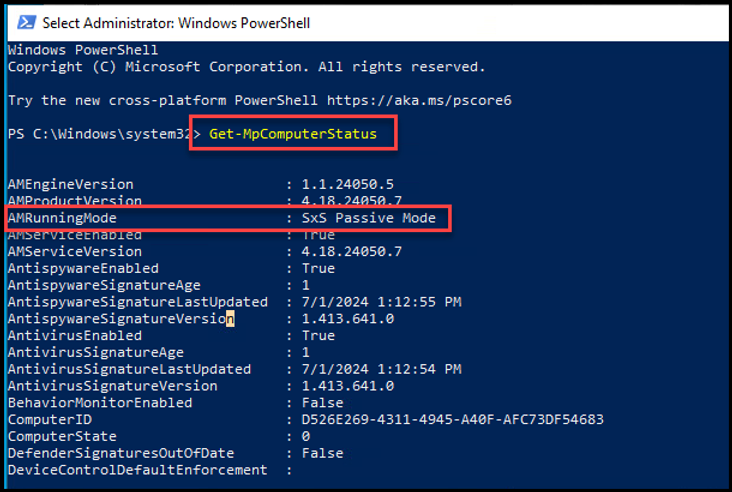
On a Windows Operating System, by default when a non-Microsoft EPP/EDR solution is installed, MDE's running mode will automatically be placed in "Passive Mode". We can confirm this by opening PowerShell (as Administrator) and run "Get-MpComputerStatus".
In the screen shot below we see "AMRunningMode" is "SxS Passive Mode" (SxS = Side-by-Side). This is because we have a non-Microsoft EPP/EDR solution installed on this product. Ultimately, this is what we want for our scenario.
We can manually set MDE to passive mode by entering the following registry key:
If we run Get-MpComputerStatus, we should see AMRunningMode in Passive Mode

Note: When tamper protection is active (which is the default setting), any attempts to override the registry or use PowerShell Set-MpPreference cmdlets will not be effective. This is due to Tamper Protection's function, which is to revert configurations back to the desired state. Consequently, if the registry setting mentioned is applied while tamper protection is enabled, the AMRunningMode will remain to "Normal" (also known as Active).
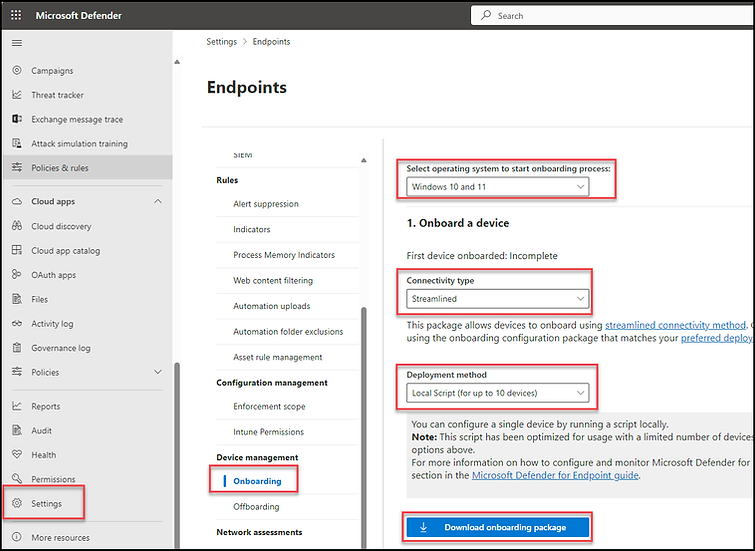
To onboard our first device, navigate to https://securitymicrosoft.com, then go to Settings > Endpoints > Onboarding. Select our operating system (e.g., Windows 10/11), choose the connectivity type (e.g., Streamlined), and the deployment method (local script). Finally, click on 'Download onboarding package'.
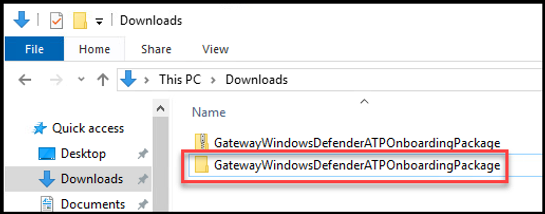
Once the GatewayWindowsDefenderATPOnboardingPackage.zip file has been downloaded, copy it to the target device.
Note: Upon examining the folder's contents, you will find a single .cmd file instead of a conventional installer like a .msi or .exe file. This is due to the fact that MDE is pre-installed on modern Windows operating systems. Executing the .cmd file essentially activates an existing Windows Service (mssense.exe) and configures it to connect to a specified tenant.

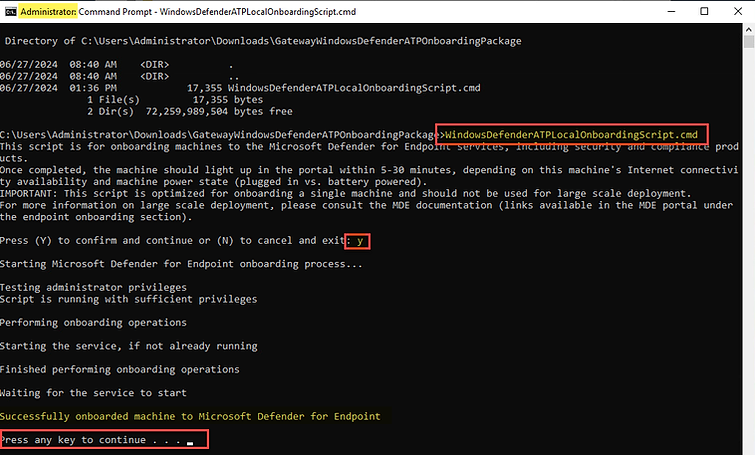
Now that we've download and unzipped our onboarding .cmd file, it's time to run onboard our device with MDE. This is done by opening a command prompt as an Administrator --> CD out to the folder where our .cmd file located --> and run the WindowsDefenderATPLocalOnboardingScript.cmd
When prompted to "Confirm and Continue" --> Enter "Y" for Yes
As the script runs, it will check for local admin permissions, start the Windows Service, and if successful we should see "Successfully onboarded machine to Microsoft Defender for Endpoint" message. At this point you can close out the command prompt.
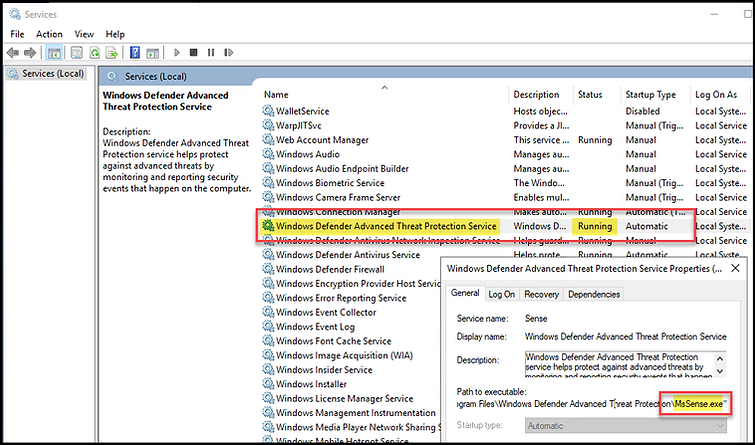
As a result of our onboarding efforts, we can see the "Windows Defender Advanced Threat Protection Service" is running.
To confirm that our device has been successfully onboarded, log in to the Microsoft Defender Portal at https://security.microsoft.com, navigate to Assets, then Devices, and select Computer and Mobile.
Shortly, we should witness the integration of our newly onboarded device.
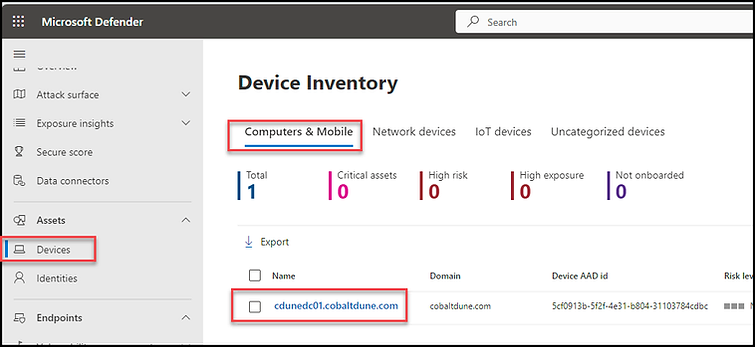
Selecting the device will redirect you to its landing page. Here, you can verify the Device Group membership, identify vulnerabilities, missing KBs, view associated incidents/alerts, check Timeline events, and access additional information.

Note: If the device was recently onboarded, some of the information around vulnerabilities, missing KB, etc. This is because MDE is still taking inventory of the device
This should provide insight into the benefits of integrating MDE alongside your current EPP/EDR solution and the steps to achieve this. In an upcoming blog post, we will demonstrate how to utilize the advanced hunting capabilities of MDE and the additional telemetry it provides for threat investigations.
Please contact us at info@lockbasecyber.com and we would be happy to talk about where you are in your endpoint journey and how we can help you get farther.